Bubble Point Testing: Step-by-Step Procedure and Demo Video
Why Perform a Bubble Point Test?
In the bubble point test, pore size rating is determined by measuring the lowest air pressure needed to overcome the surface tension between the wetting liquid and the membrane pores in a fully wetted membrane. This pressure level, known as the bubble point, is signaled by the first appearance of a steady stream of bubbles observed from a special disc filter holder through the downstream side of the membrane filter. The measured bubble point is then correlated to the membrane pore size diameter.
The Role of Capillary Action in Determining the Bubble Point
To understand bubble point testing, it is helpful to briefly examine the relevant physics. Consider liquid in contact with the opening of an individual air-filled pore: the free liquid surface deforms into a curved shape where it contacts the pore surfaces. This deformation allows a component of the surface tension forces (which are always parallel to the liquid surface) to unexpectedly act in a direction parallel to the pore surfaces that causes a remarkable behavior called capillary action.
If the liquid contact angle is substantially <90°, then surface tension forces act to pull the liquid into the pore and spontaneously fill the pore without applied external pressure. Once the pore is filled with liquid, it becomes a barrier to bulk gas flow. The same capillary action that filled the pore acts to retain the liquid and prevent gases from entering. The liquid-filled pore blocks the flow of gases unless enough external pressure is applied to overcome the surface tension forces holding the liquid in the pore. The pressure at which the liquid is forced from the pore is the bubble point.
How to Measure the Bubble Point
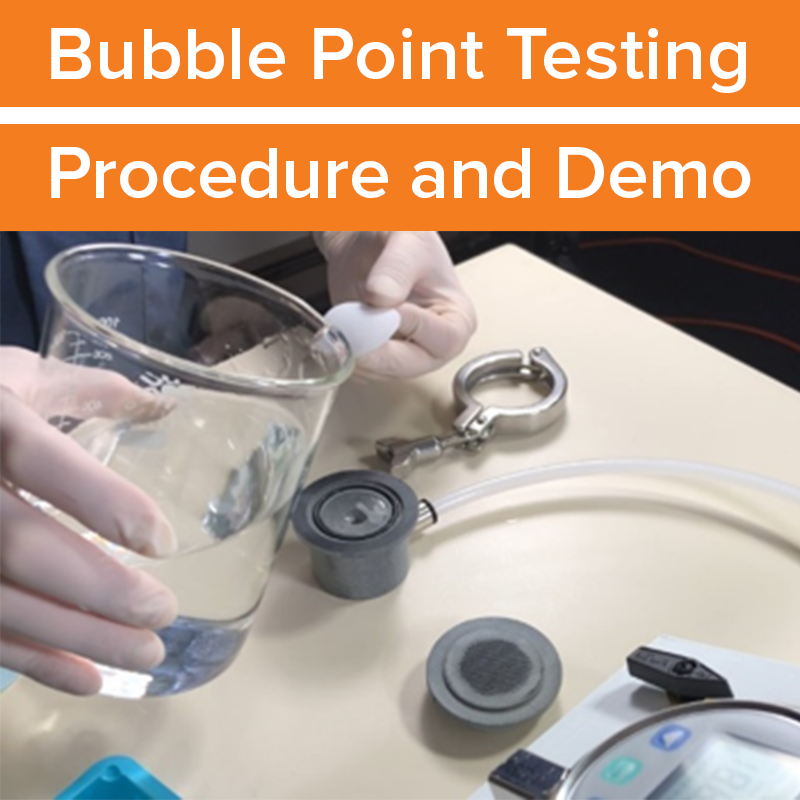
Membrane bubble point is empirically measured using specialized disc filter holders, typically 47 mm disc size. These holders maintain a small observable liquid reservoir above and downstream of the membrane filter. Compressed air is applied against the upstream bottom surface of the membrane filter. The pressure is increased at a specified rate until a steady stream of bubbles is observed emerging from the membrane through the water. The pressure at which the stream of bubbles occurs is the bubble point.
For more detailed information on bubble point testing and associated references, view our whitepaper here.
Bubble Point Testing Procedure
Bubble Point Testing Step-by-Step Instructions
- Don protective safety glasses and examination gloves.
- Prepare the bubble point tester.
- Verify the air control valve is turned to OFF.
- Turn the pressure regulator knob fully counterclockwise (it’s okay if the knob comes off – simply screw it back in one or two turns).
- Verify that the bubble point holder base is attached to the end of the outlet tubing.
- Attach the compressed air line to the tester.
- Turn on the pressure gauge and verify that it reads zero.
- Turn the air control valve to ON.
- Gather 2 clean 500mL (or 1L) beakers, 1 clean small blue holding tray, and a supply of paper towels. Fill one beaker about 2/3 full of RO water and use this beaker to fill the holding tray about 1/2 full. Use paper towels as needed to mop up water spills.
- Retrieve a new disc filter and wet out by carefully floating it on the water surface in the holding tray and allow to sit for 30sec. Alternatively, place a waterflow-tested disc filter
- Using the filled beaker, carefully pour clean RO water into the holder base until the water level reaches the top of the O-ring. Retrieve the disc filtero-ring, so that there is no air trapped underneath it.
- Carefully place the holder top on the base and hold together with one hand while placing the clamp around the holder with your other hand. While holding the clamp in place, position and tighten the thumbscrew until the clamp is secured.
- Refer to the supplier CoC/CoA or specification table document to determine the manufacturer’s minimum water bubble point specification.
- Continuously turn the pressure regulator knob clockwise until the pressure gauge reads approximately 50% of the filter’s minimum water bubble point. This should be done with expediency, typically in about 15sec. Water will fill the open reservoir in the holder top. The reservoir should be approximately ½ to ¾ full. Add clean water (or remove water) as necessary. Allow the system to sit and stabilize for approximately 15sec. Occasional small bubbles may cling to the holes at the base of the reservoir; sweep or tap these away using a fingertip. Before proceeding, there should be no air bubbles appearing in the reservoir.
- Begin slowly turning the regulator knob clockwise, approximately ¼ turn per second. Simultaneously, carefully watch the bottom of the reservoir for bubbles to appear. Stop turning the knob when you see the first stream(s) of bubbles appear.
- Read the pressure gauge and record the bubble point pressure in the test log.
- Turn the regulator knob briskly counterclockwise until the pressure gauge reads 0. Lift and invert the holder over the waste beaker to remove the water from the reservoir and set back down. Verify that the pressure gauge still reads 0 then loosen the thumb screw and remove the clamp. Separate the holder top from the base then remove and discard the used filter.
- To test additional filters, repeat the procedure from Step 5. When testing is finished, purge any residual water from the holder base by holding it inverted with a wadded paper towel against the opening and turn the regulator knob slightly clockwise, allowing low pressure air to flow through the holder for several seconds. Then turn the regulator knob counterclockwise until the pressure gauge reads 0, set the holder bottom down, disconnect air supply hose, turn air control valve to OFF, and turn pressure gauge off. Discard wastewater and unused clean water. Clean beakers as necessary, clean or discard small blue tray, and use paper towels to wipe all wet surfaces dry.


